8 Getting set up
This chapter will get your computer set up with what you need for the course. You need to read carefully and follow instructions to the letter. Click the icons to copy each command to your clipboard.
If you are coming back here to rerun the setup because you have problems getting it to work, you can safely rerun the entire sequence. Your existing instructing-machines folder will not be overwritten but saved alongside the new one with an -old-<timestamp> suffix.
Instructions differ on Mac and Windows so pick which kind of computer you have below:
1. Quit Finder, Terminal, and VS Code completely if they are running.
2. Open a new Terminal window and run this command to download the course folder to your home folder:
curl https://munch-group.org/instructing-machines/instructing-machines.zip > ~/Downloads/instructing-machines.zip3. Run this to unpack the student folder and put it in your home folder:
bash -c 'im=$HOME/instructing-machines; [ -d "$im" ] && mv "$im" "$im-old-$(date +%Y%m%d-%H%M%S)"; unzip -q "$HOME/Downloads/instructing-machines.zip" -d "$HOME"'4. Run this to install Pixi:
curl -fsSL https://pixi.sh/install.sh | sh && sh ~/instructing-machines/.pin_shell_path.sh5. Run this to kill all Terminal sessions:
killall Terminal6. Run this in the new Terminal to make sure pixi is installed. If it is, it will print its version number:
pixi --version7. Run this to install the im course tool:
pixi global install -c conda-forge -c munch-group im-course-tools8. Run this to make sure it installed. If it did, it will print its version number:
im --version9. Run this to build the environment:
pixi clean -m ~/instructing-machines ; pixi install -m ~/instructing-machines10. Run this to finish the environment setup:
pixi run -m ~/instructing-machines check11. Download VS Code text editor from code.visualstudio.com and complete the default installation.
12. Open VS Code. You should see something like Figure 8.1. The first time you start VS Code it greets you with a welcome screen that wants you to sign in. Nothing on this course needs an account, so you can click “Continue without signing in”.
13. Open the instructing-machines folder using File → Open Folder. The entire course setup only works if you open the folder.
14. At the bottom left, click the blue ‘Restricted Mode’ button, then click ‘Trust’ and close the panel. If you are prompted to “Trust this workspace”, do that too.
15. If prompted install the recommended extensions. Otherwise, open the Extensions panel on the left (icon with four squares), search ‘@recommended’ and install all the listed extensions.
16. Press Cmd+Shift+P, type Shell Command: Install 'code' command in PATH, and press Enter.
17. Quit VS Code completely.
18. Open a new Terminal and run this to check that VS Code got what it needs. It should list the extensions it found:
pixi run -m ~/instructing-machines check-vscodeIf it names something as missing instead, do what it says and run it again.
1. Quit File Explorer, PowerShell, and VS Code completely if they are running.
2. Open a new PowerShell (Start menu → PowerShell) and run this command to download the course folder:
iwr -Uri "https://munch-group.org/instructing-machines/instructing-machines.zip" -OutFile "$env:USERPROFILE\Downloads\instructing-machines.zip"3. Run this to unpack the student folder and put it in your home folder:
$im = "C:\instructing-machines"; if (Test-Path $im) { Move-Item $im "${im}-old-$(Get-Date -Format 'yyyyMMdd-HHmmss')" }; Expand-Archive -Path "$HOME\Downloads\instructing-machines.zip" -DestinationPath 'C:\'4. Run this to install Pixi:
irm -useb https://pixi.sh/install.ps1 | iex5. Run this to quit/restart all Powershell sessions:
Stop-Process -Name "powershell"6. Run this in the new Powershell to make sure pixi is installed. If it is, it will print its version number:
pixi --version7. Run this to install the im course tool:
pixi global install -c conda-forge -c munch-group im-course-toolsIf this fails, it may be your antivirus software now allowing Pixi though its firewall. If you are using BitDefender, here are instructions for how do allow this. If you have other brands of antivirus software, you can Google: “bitdefender add firewall rule” (replacing “bitdefender” with whatever brand you use).
8. Run this to make sure it installed. If it did, it will print its version number:
im --version9. Run this to build the environment:
pixi clean -m C:\instructing-machines ; pixi install -m C:\instructing-machines10. Run this to finish the environment setup:
pixi run -m C:\instructing-machines check11. Download VS Code from code.visualstudio.com and complete the default installation.
12. Open VS Code. You should see something like Figure 8.1. The first time you start VS Code it greets you with a welcome screen that wants you to sign in. Nothing on this course needs an account, so you can click “Continue without signing in”.
13. Open the C:\instructing-machines folder using File → Open Folder. The entire course setup only works if you open the folder.
14. At the bottom left, click the blue ‘Restricted Mode’ button, then click ‘Trust’ and close the panel. If you are prompted to “Trust this workspace”, do that too.
15. If prompted install/trust the recommended extensions Otherwise, open the Extensions panel on the left (icon with four squares), search ‘@recommended’ and install all the listed extensions.
16. Quit VS Code completely.
17. Open a new PowerShell and run this to check that VS Code got what it needs. It should list the extensions it found:
pixi run -m C:\instructing-machines check-vscodeIf it names something as missing instead, do what it says and run it again.
We put your instructing-machines folder where it is least likely to give permission problems and cloud sync issues, and moving it somewhere else voids its warranty. Even if you want to move it anyway, do not do that before you have successfully set it up in the standard location and made sure everything works as it should. After moving the folder, it may still work if you navigate to its now location in the terminal and run pixi clean, pixi install, pixi run check (in that order).
Visual Studio Code (VS Code)
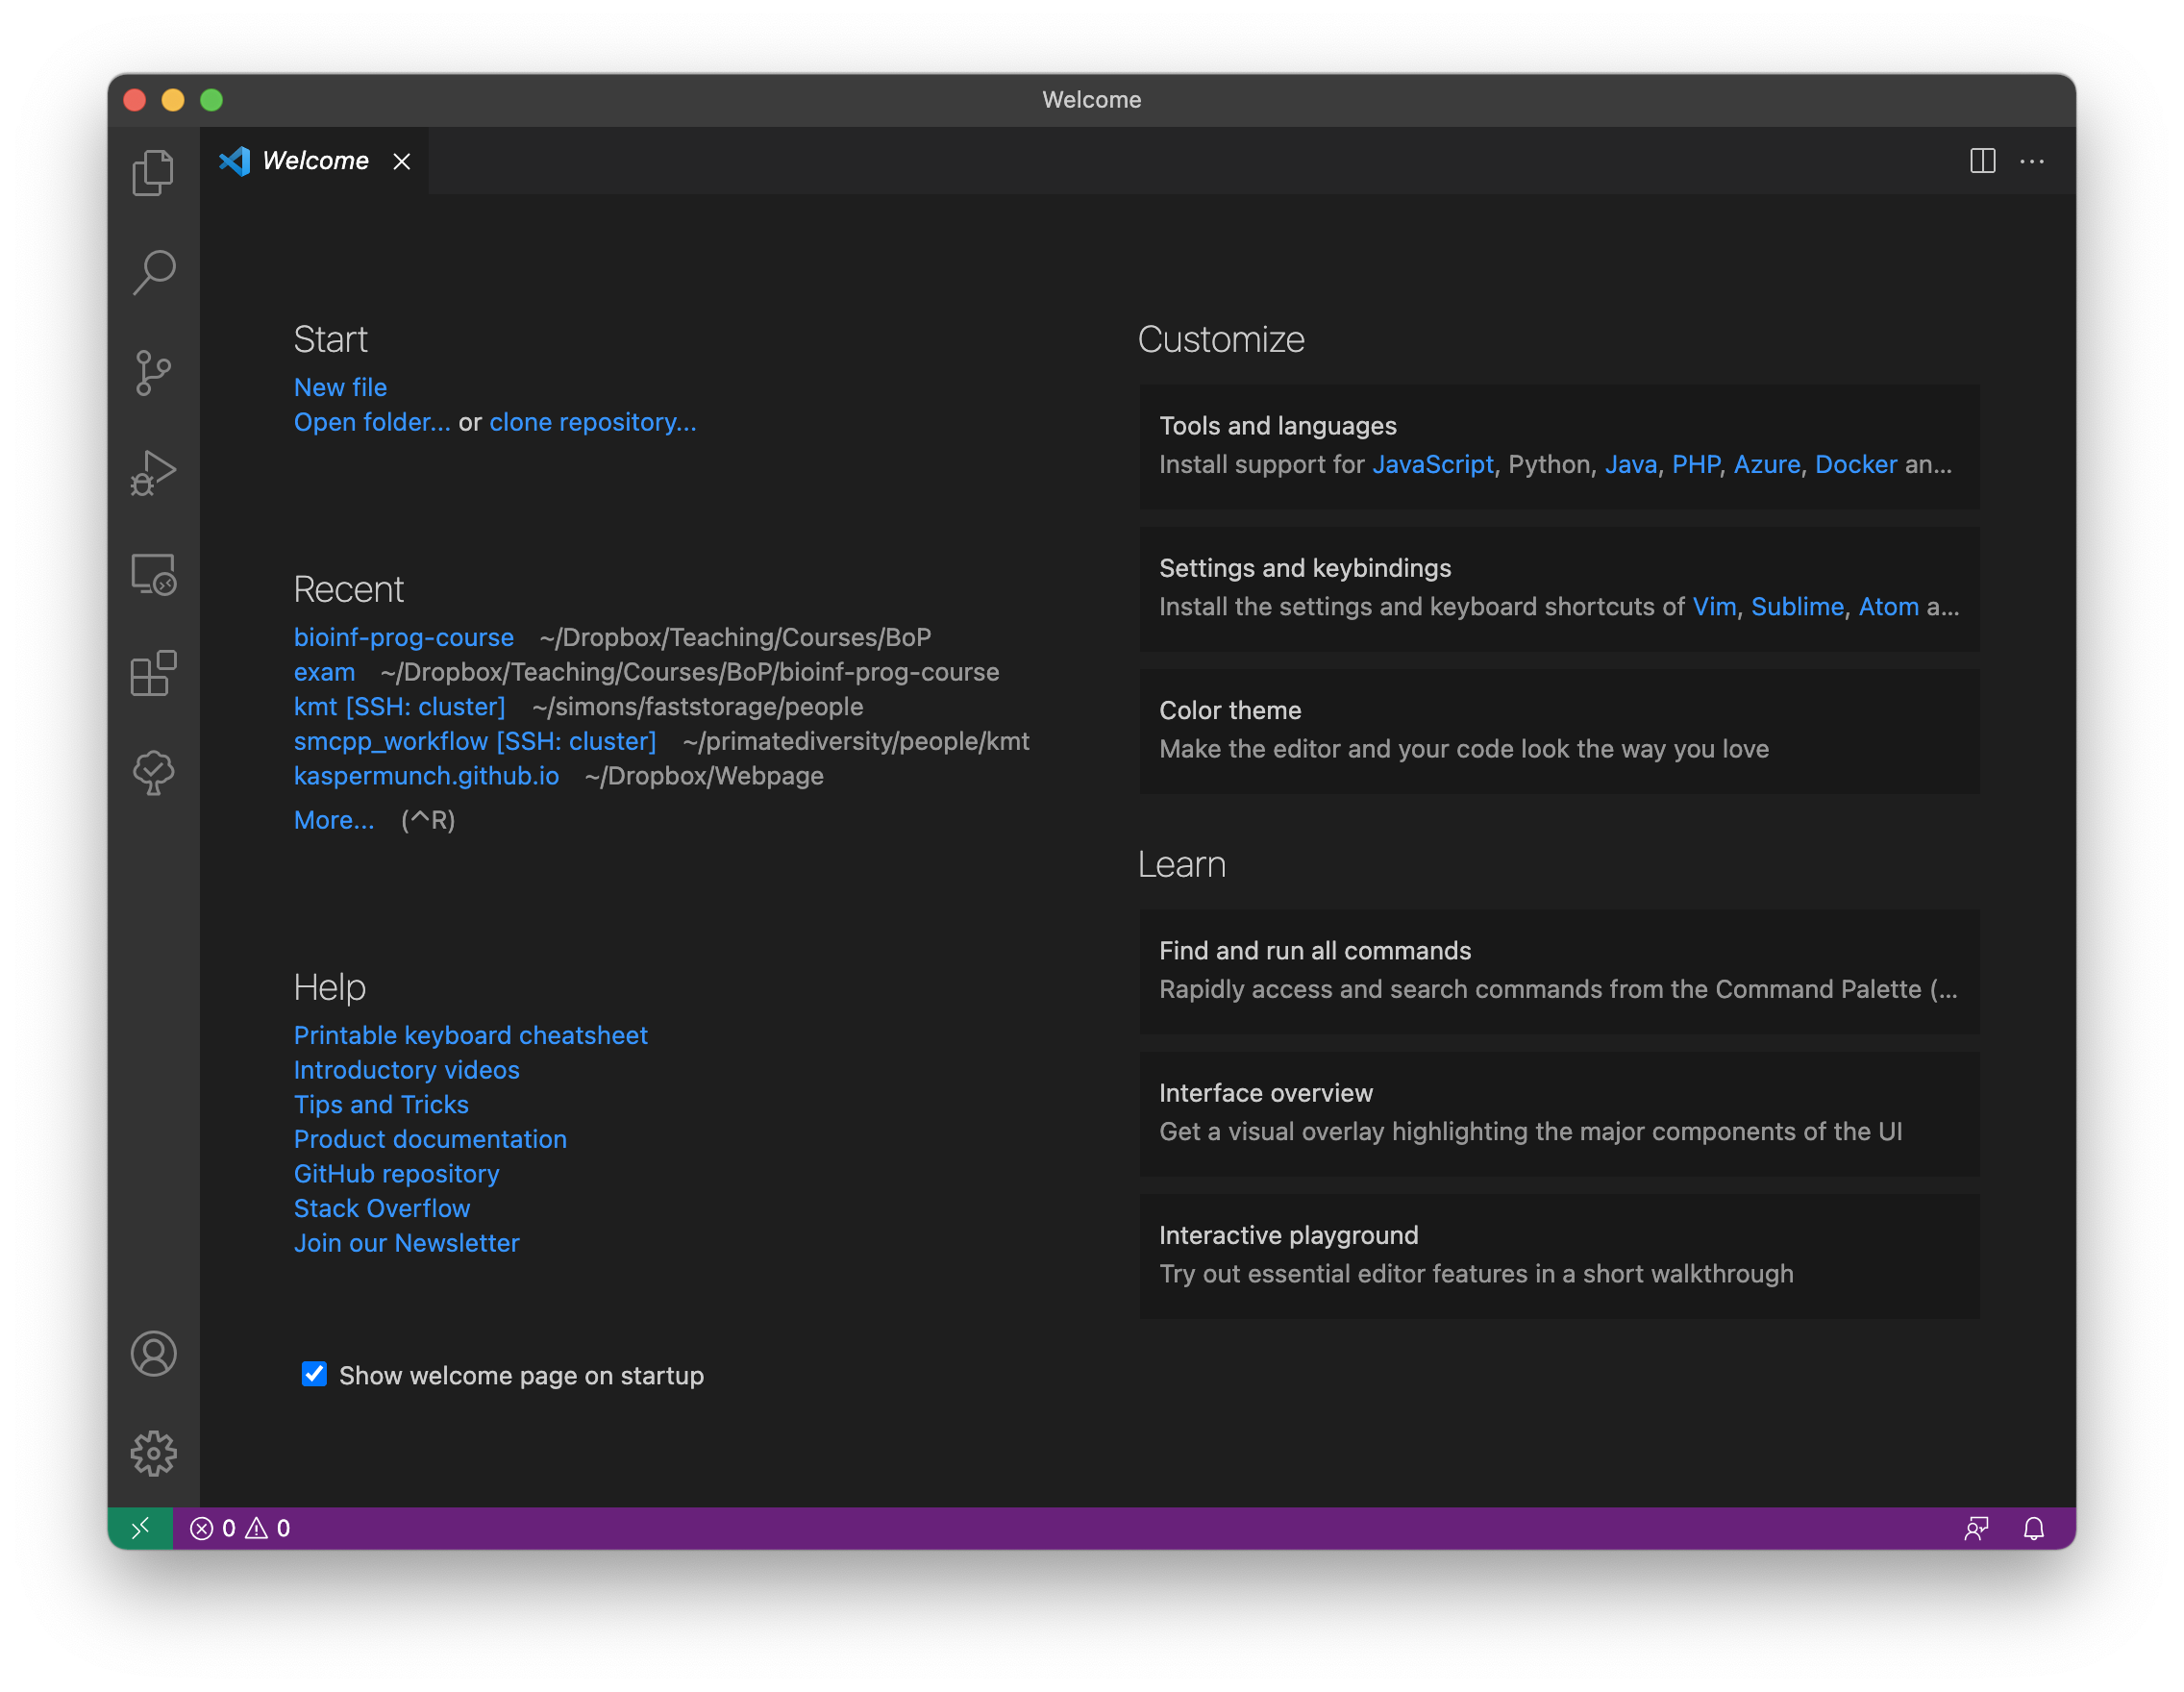
In this course, we will use VS Code as our text editor. You may wonder why we cannot use Word to create and edit files with programming code. The reason is that a text editor made for programming, such as VS Code, only saves the actual characters you type. So, unlike Word, it does not silently save all kinds of formatting, like margins, boldface text, headers, etc. With VS Code, what you type is exactly what is in the file when you save it. In addition, where Word is made for prose, VS Code is made for programming and has many features that will make your programming life easier.
if you successfully completed the setup instructions above, you can open your instructing-machines folder by selecting Open Folder from the File menu, or by clicking the folder icon on the welcome screen. You can also open the folder from the terminal. cd into the course folder and then run code .. . means “the current folder”.
NB: Remember that the entire course setup works only if you open the folder and not any individual file.